Showing posts with label Ocean Research. Show all posts

Sunday, April 28, 2019

Paper Mache Clownfish


When I taught first grade we used to transform our classroom into an ocean wonderland. This is one of the main things I miss about teaching first grade. Now that I am in second grade I think I may focus my attention to creating a rainforest wonderland, or perhaps a second grade version of the ocean wonderland my firsties and I loved so much!

I have had some questions about my paper mache clownfish that have been posted on the blog and Instagram. I thought I'd take this opportunity to post a "how-to" guide to help those of you wanting to create these adorable sea creatures with your class.

Here are the supplies you will need:

- Balloons (and pump if you want to make it easier on yourself!)
- Newsprint Paper
- Elmers Art Paste
- Small Containers for the paste
- Pitcher or Bucket
- Paint- Orange, White, and Black- My favorite brand is Jazz Gloss
- Model Magic
- Plastic Bowls
- Google Eyes
- Orange Foam
- Fishing Line
- Glue gun and hot glue


Step One: The first step is blowing up the balloons to your desired size and cutting or tearing the newsprint into pieces. Then make the art paste in a pitcher according to the directions. I find I usually need two boxes for a class of 24 students.

I like to do this project in small groups of 4 or five students, but it also works as a class. The easiest way to protect tables is to get plastic tablecloths to line the tables with. Towels are also great for spills and sticky hands.

Step Two: Pour a little paste into the containers and provide each student with a handful of newsprint. They will need more later, but give them a pile to start. I like to write their names on a bowl and put the balloon inside so it doesn't roll around all over the table. Have the students dip a paper into the paste and use two fingers to wipe off the excess into the bowl. They will then spread the paper onto the balloon. They will cover the balloon with one layer to start. Once the first layer is complete have the students cover the balloon with two more layers. You may take a break between layers and even complete layers on separate days (if you are willing to deal with the mess on multiple days!). Tip: sometimes the students' balloons get extra wet. Have the students just place dry newsprint on the overly wet parts without dipping back into the paste if necessary.


Step Three: Place the bowls with the paper mache balloons in a good place to dry. You will need to rotate the balloons so all sides dry.

Step Four: Pour paint into containers and have students paint the balloon orange. One balloon dries, I have them paint white stripes on the balloon. Sometimes it looks great to line the white with black marker or black paint.


Step Five: Pre-cut dorsal fin, and pectoral fins out of orange foam. Roll rings out of Model Magic for eyes and let them dry overnight.

Step Six: Call students over one at a time and have them show you where they want you to attach fins, eyes, and mouth. This needs to be hot glued, so adult help is necessary. Glue on the pieces according to student directions. At this point I also write student names on the bottom of the fish with permanent marker.

Step Seven: Poke hole in top fin with end of fishing line, knot the top and add a glue dot with glue gun to hold. Fish can be hung from the ceiling to create your ocean wonderland!

Please comment with any questions you may have about these adorable clownfish!


Here are some other resources for your Ocean Wonderland Transformation!


Saturday, April 29, 2017

Octopus Art Project


For Open House each year, my class transforms our room into an Ocean Research Center. This year I have integrated a few new projects. One of the new favorites is our octopus art. We learned about the amazing octopus and created a culminating art project to display for Open House.


I had the students choose two sheets of any color of construction paper. I then instructed them how to paint using the sponge method. They chose any colors of paint they wanted and then they painted away with tempera paints.


After the paint dried, I had the students trace the octopus body shapes on the back of the construction paper using templates I created. Then we had a paper cutting party and all the students cut their octopus pieces out.

I then helped the students glue their octopus together in small groups. We added eyes using tempera paint sticks.

I hung the octopus art on the bulletin board outside of our room to welcome the parents into our classroom. I stapled the octopus art to look as if they were crawling over the bulletin board paper.
Here is a picture of the unfinished bulletin board... words of welcome coming soon!


My students loved this project! Stay tuned for future posts about our latest ocean projects for Open House!

To get the templates click here!

Sunday, May 3, 2015

Open House and Our Ocean Research Center

At my school Open House is a HUGE deal! Teachers and students go all out and completely transform their classrooms to celebrate the hard work and fun we have had all year long. In first grade we transformed our classroom into an Ocean Research Center. We have spent weeks learning all about the ocean and many ocean animals. We used our new knowledge and integrated art and writing in a variety of engaging projects. Check out our magical ocean wonderland below!


We called our room "Ocean Research Center" because we have spent weeks learning as much as we could about sea life. The children felt like research scientists and took our study very seriously!
This picture shows many of our "Have, Can, Are" charts. These charts are perfect for organizing information learned. The students can use the information to write informational pieces. The whale wonderings chart is another chart that helped us with our ocean research. At the beginning of our whale research, I asked each child to ask a question about whales that they would like answered during our study. We then read books, watched videos, and researched information on the internet. As we found answers to our questions, we recorded them on our whale chart. 
 This cute little crab project was inspired by this post. The students loved creating these little cuties out of actual shells.

We learned about sea turtles and created these adorable 3-dimensional sea turtles for our classroom. We also created divers, complete with student pictures attached.
After our study on whales the students created a diagram of a humpback whale. 

These cute little clownfish were a favorite project for my students. They were so interested in the little fish that are immune to sea anemone stings! We decided to hang the fish from the ceiling to complete the "Under the Sea" feel.
These pop-up aquariums were fun for the students to complete.
We couldn't leave all of the ocean fun to just informational stories. Our class read Mister Seahorse by Eric Carle and created these cute watercolor seahorses to celebrate the sweet story. We then compared the fictional elements with the events that occurred and compared them to the factual information we learned about seahorses.
Clownfish and Jellyfish
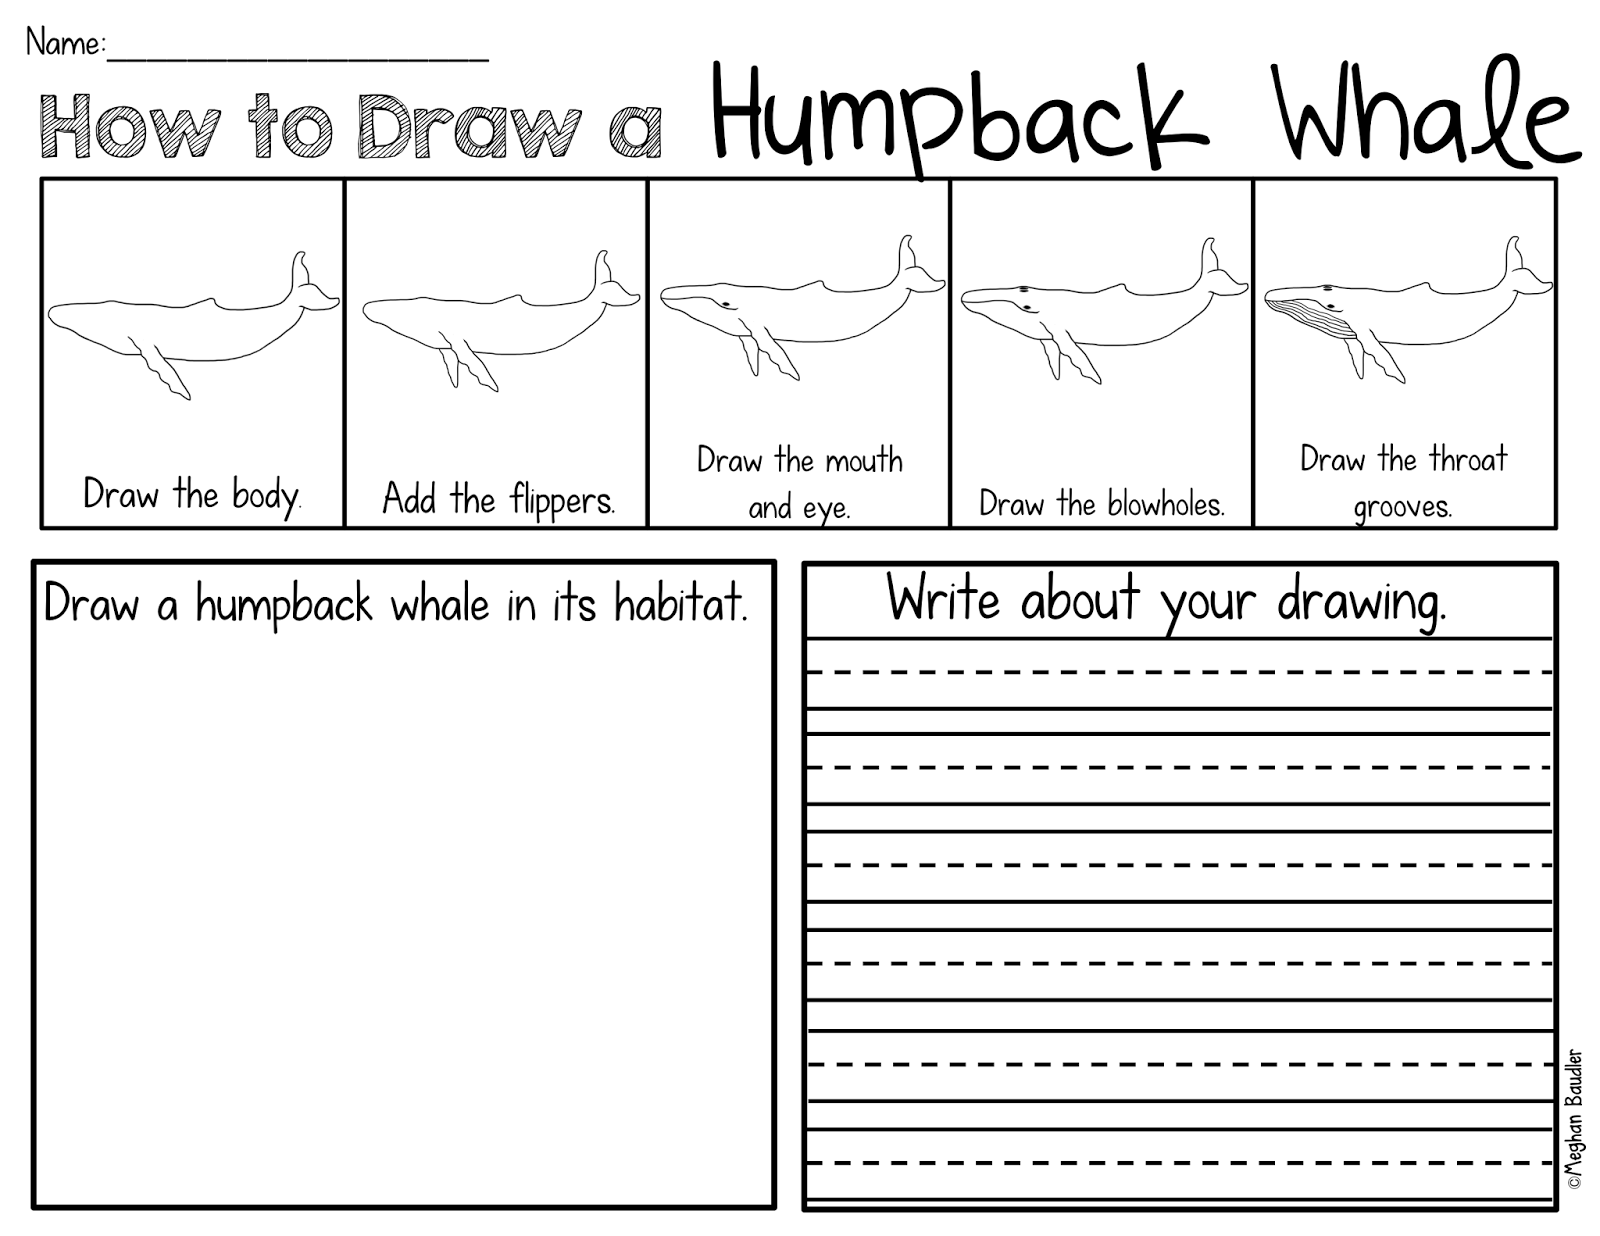
We have also completed a variety of writing pieces to go with our ocean study. Here is an example of a "How to Draw Ocean Animals" page my students completed. These activities have been great writing centers for my students. It not only teaches them how to draw the animal, but it provides them an opportunity to write about what they have learned. Each ocean animal comes with a fact page, word bank, and two versions of the draw and write page. Check them out here!


Check out the How to Draw  Humpback Whales Freebie here!


We had so much fun with our study and it made for a magical experience. It will be difficult to take down the ocean wonderland, but I know my students are excited to take their projects home to recreate the ocean in their own rooms! 

Happy Teaching!